
05 Sep Easy Eco Beeswax Seashell Candles
A flickering flame at the center of a dinner table amid a lazy evening’s tapas spread creates the kind of charming ambiance our midsummer night’s dreams are made of. When seated at home with a flickering flame from a homemade beeswax candle cradled in one of our ocean’s collectible treasures, that’s when life reaches new balmy eco heights.
Here’s how to make these ridiculously easy DIY seashell candles, plus a handful of other tips and tricks for general eco candle making.
WHAT YOU’LL NEED:
- Beeswax chunks
- String or twine
- Essential oils (I went with SOIL’s grapefruit and lemongrass for spring freshness and bug deterrent)
- Gathered seashells from your beach adventures
- A pot
- Glass jar (Console or Pyrex are hot water suitable)
- Wooden chopstick
- Water
EASY DIY STEPS
- Set the pot on the stove with water in it and bring to the boil.
- Place the glass container in the water and pop the hard beeswax blocks into the container.
- Once the water is boiling turn the heat down lower so as to minimize the jar or bowl from moving about too much.
- When the wax is all liquid, dip a length of twine (30cm should be enough, but try to gauge based on how many candles you’re making) into the hot wax and lay it out on a tray in an elongated snake to cool. This should only take a few minutes.
- While this is setting, get your chosen essential oils and add about 10-15 drops into the melted beeswax. Stir with a wooden chopstick.
- Then cut the newly dipped wick into 3-4 cm lengths to use for the individual seashell candles.
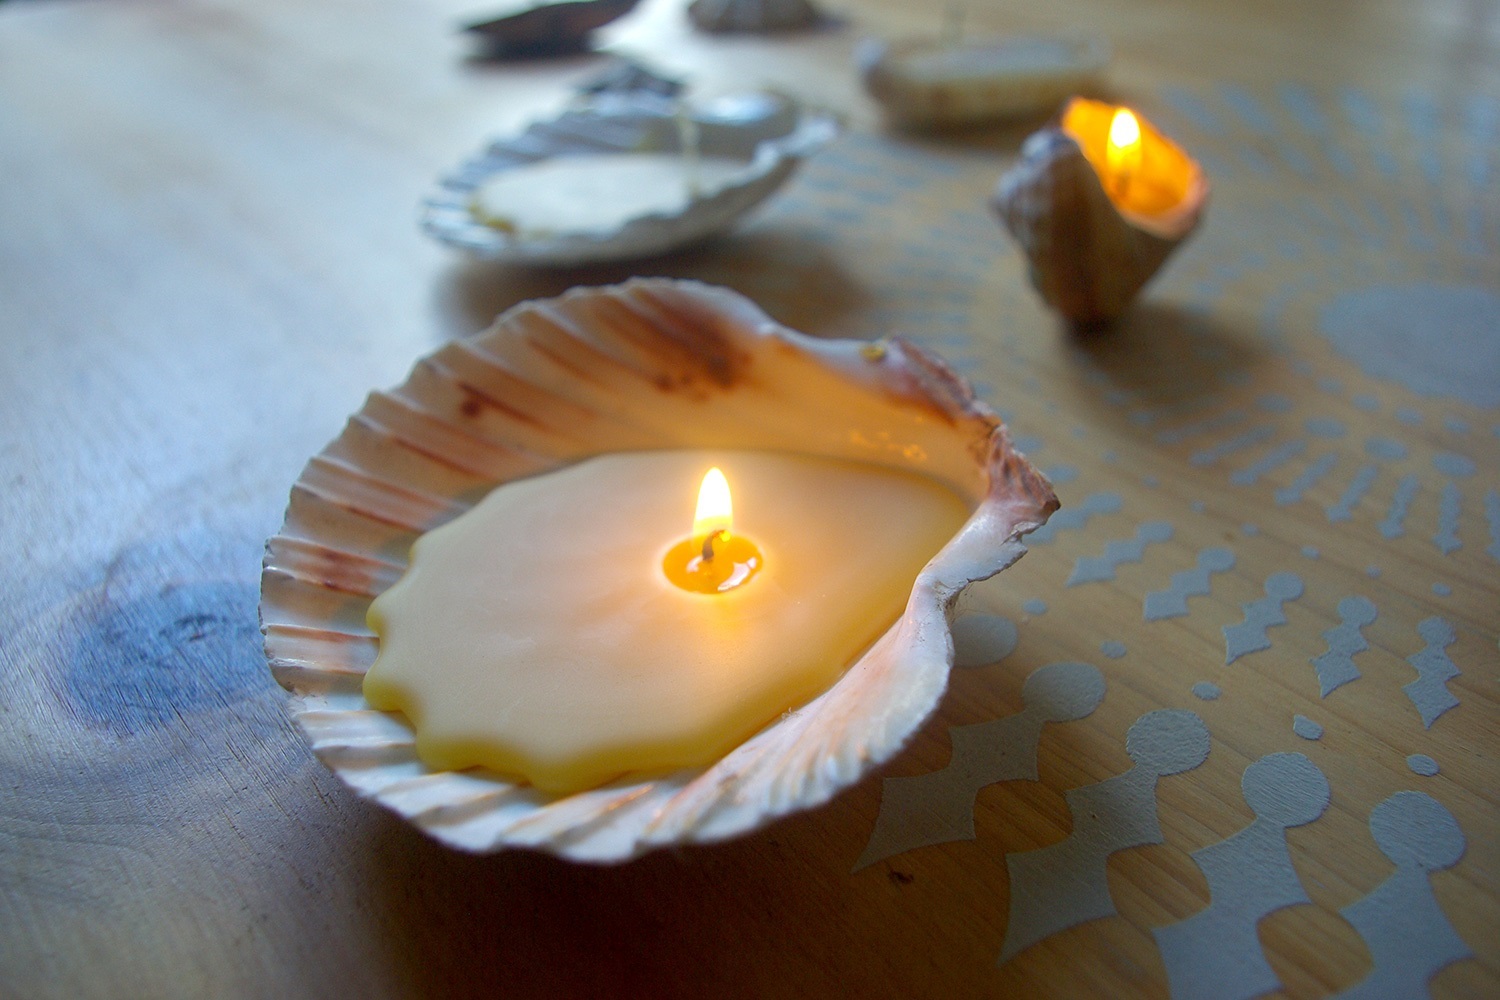
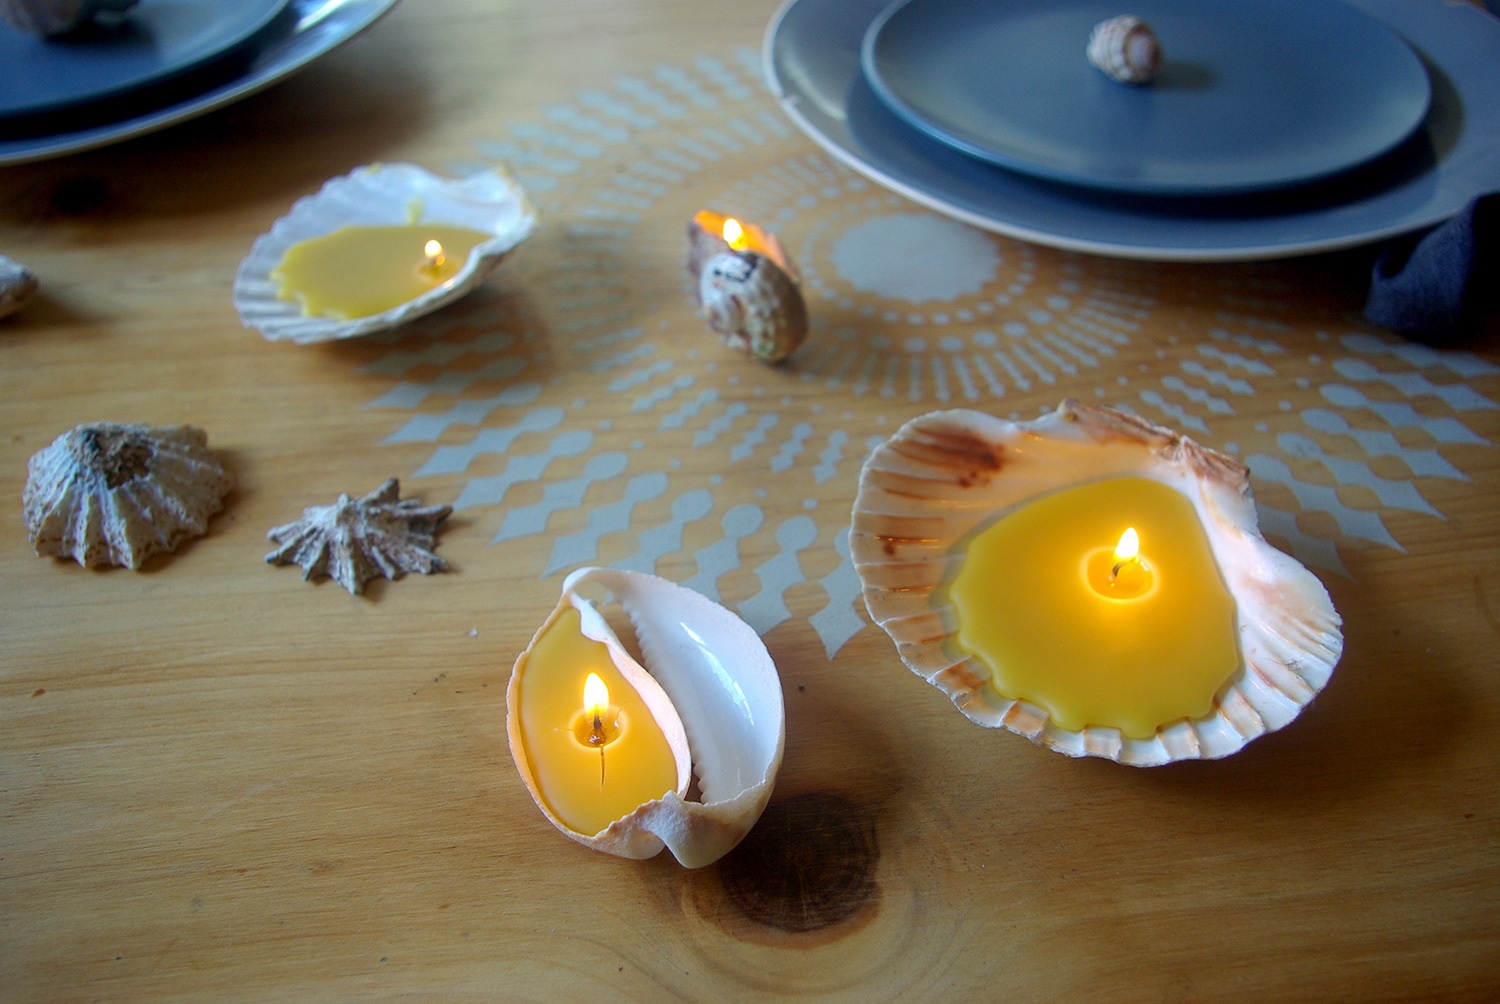
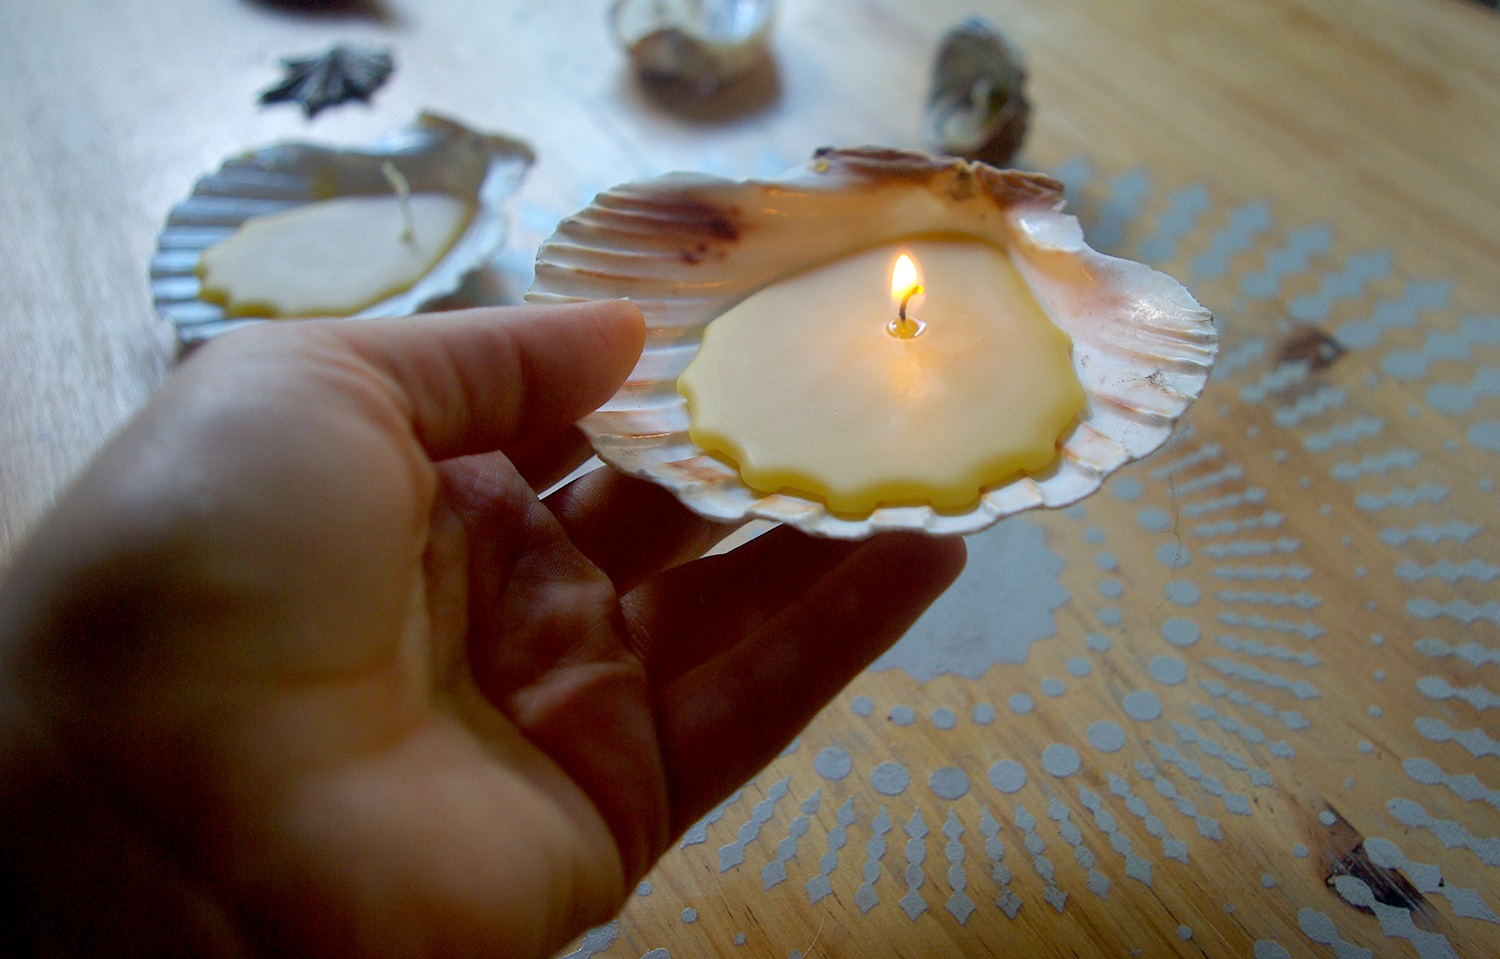
- Set your shells out on a tray and pour a small amount of wax into the bottom of each candle. If you find it hard to pour, use the wooden chopstick to drop just a bit into each shell. This will act like a secure for the wicks in a minute. Leave this to set for 2 minutes.
- Then pop your cut wicks into the middle of each one (the wax will have settled in the deepest part of the shell, which is where you want the wick so it burns the longest). Leave to set completely for another 5 minutes.
- Now pour your liquid beeswax into each shell slowly until the level is close to the rim.
- Leave to harden for a few hours.
WHY I LOVE USING BEESWAX FOR THESE CANDLES
- It burns much slower so our candles last longer
- No toxic fumes around food and romancing with wine
- Lower burning temp makes the wax safer in case of spillage and also the shells can take the heated wax and don’t break
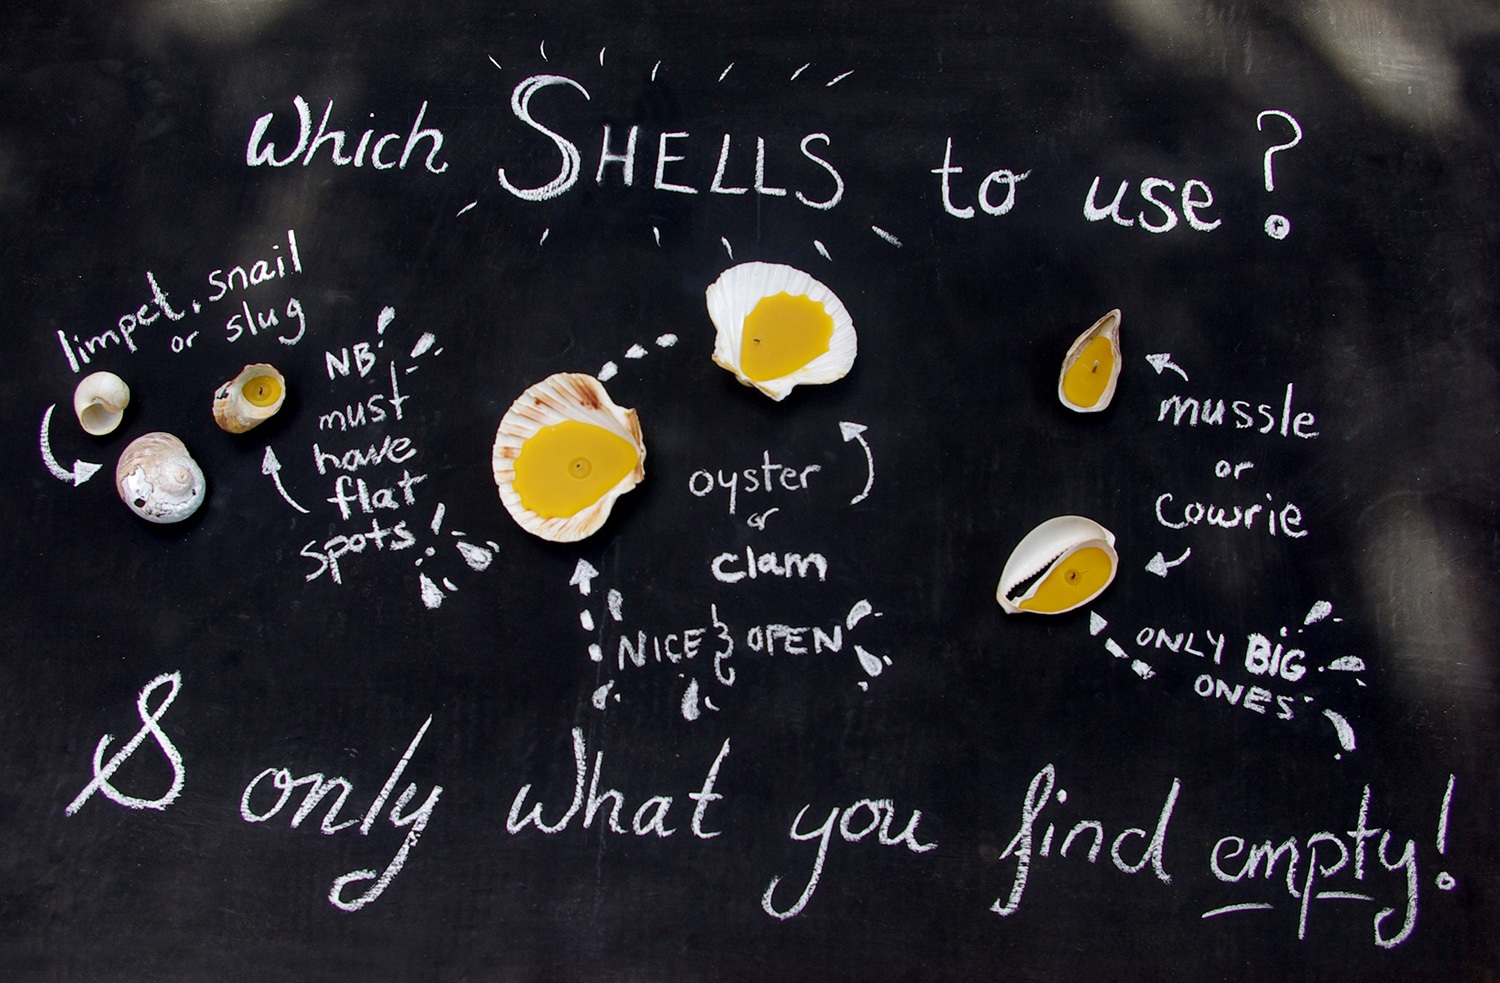
AN IMPORTANT NOTE ON THE SHELLS
I feel it goes without saying, but then it’s always worth stressing – only use shells you find on your beach walks or adventures that have already been vacated by the living creatures who once used them as a home.
Buying fancy, large and rare shells from boutique tourist shops is also not a good idea because you might be unknowingly supporting an industry that isn’t ensuring the sustainability of the species they’re harvesting from the sea purely for commercial tourist purposes.
These seashell candles were all made from shells found on Hout Bay, Brandfontein & Umhlanga beach.
GENERAL CANDLE MAKING TIPS AND TRICKS
- Containers you want to repurpose like broken mugs and teacups make for lovely vintage candles
- Use a wooden wash peg horizontally and balanced on the rim of the container to pinch the wick so it stays in the center of whatever vessel you’re pouring into.
- No pegs? Cut the top of your egg carton in strips and poke a little hole through it. Wiggle the wick through this so it can balance over the top rim of your container or shell while suspending the wick below.
- Don’t be impatient! Let your candles set fully before trying to remove your cardboard strip for the next batch of candles.
- If you’re making pillar candles which you want to remove from the container – remember it must be wider at the top of the container (the base of your candle) or it won’t come out

AN UNLIKELY ECO TIP ON USING NON-BEESWAX CANDLES
I would love all my candles in my home to be beeswax eco candles, but on occasion I get gifted a regular candle. When those burn down, it’s far kinder to the environment to melt that wax down, pour it into a container and put a new wick in it, than just tossing the rest away. It won’t biodegrade anywhere and at least this way you’re using it and all the resources that went into making the whole of it, up in its entirety. Burn it outdoors in hurricane lamps if you’re worried about fumes. It’s the lesser of two evils in my book.
Here’s hoping you find much enjoyment making these over the warmer months and enjoying them over pleasant evening picnics.
UPDATE: Shells are not the best conductors of heat and get pretty hot to the touch, be sure to handle gently. They could also leave little scorch marks on whatever surface they are on.
Feeling inspired? Take a look at these guides for more eco-friendly craft ideas.
No Comments