
12 Apr Real Red Velvet Cake
Back in the day, Red Velvet cakes were made with fresh beetroot and not food colouring. Since April is Earth month it seemed like a good time to test out that earthy beetroot flavour and make a real Red Velvet Cake.
What put me off until now is the messy process of grating the beetroots and staining my counters and hands pink in the process. But this is no longer an issue since some clever folks concentrated all the colour and goodness of beetroots into a beautiful crimson beetroot powder!
Something I discovered rather quickly is that beetroot only maintains its gorgeous colour in an acidic environment. Once you add baking powder or bicarbonate of soda, your cake will end up brown. Omitting these ingredients and adding some lemon juice to the mixture resolves this. Whipped egg whites are used to incorporate air in place of a raising agent.
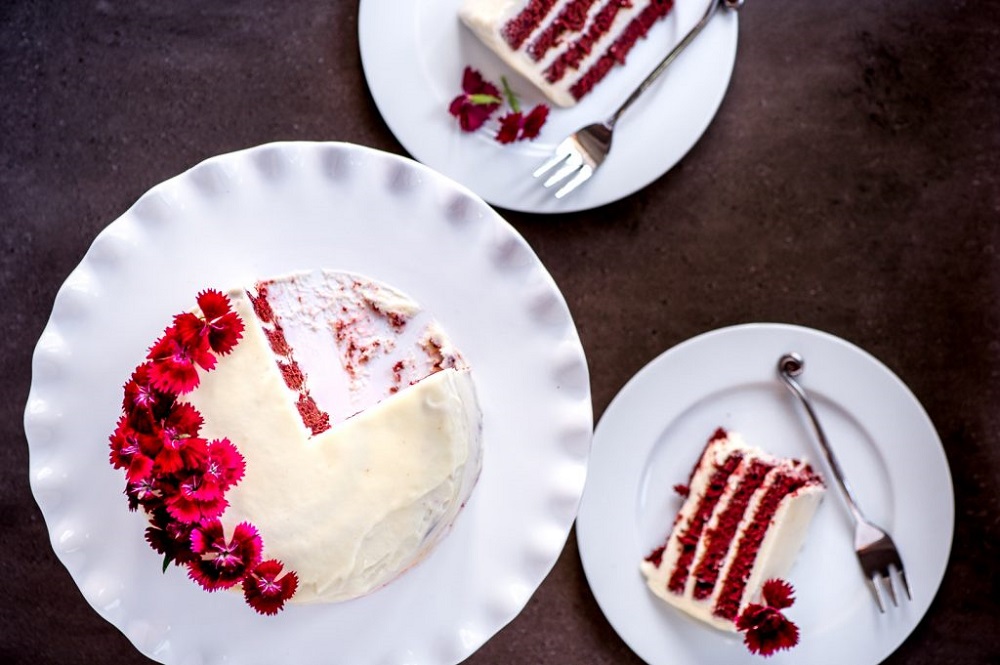
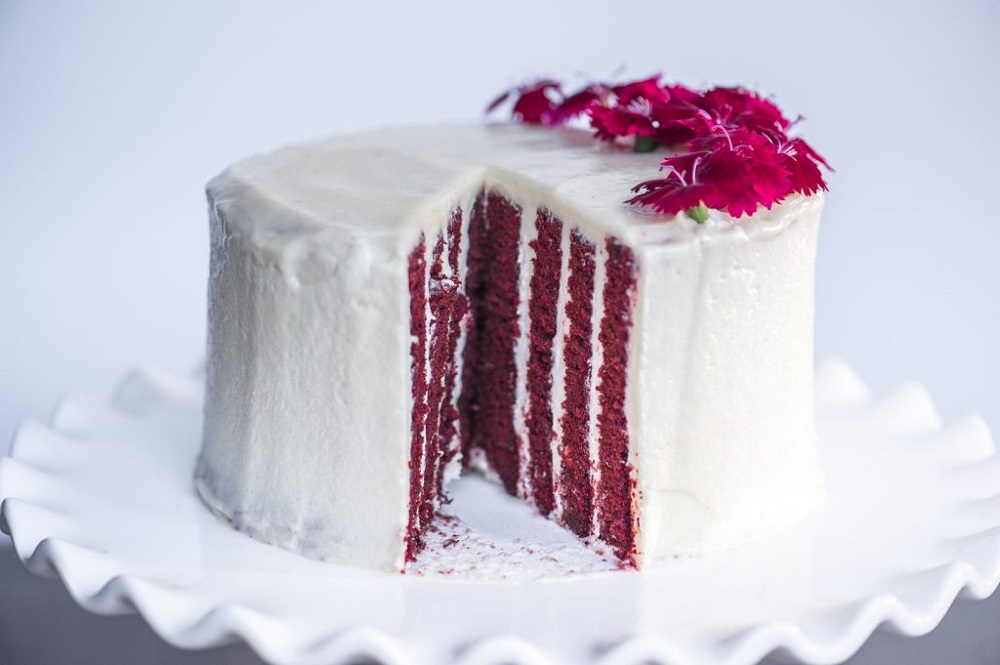
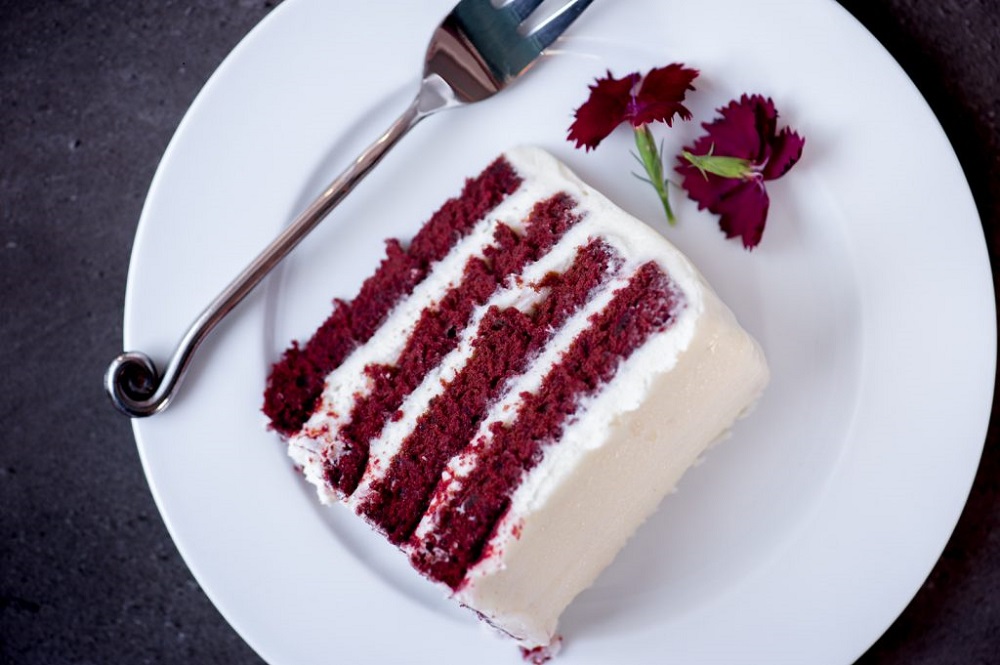
Red Velvet cakes are beautiful in their own right, but making a vertical stripe version adds a real wow factor. As impressive as it looks, it just involves rolling up strips of cake like a Swiss roll and turning it on it’s side. When you slice through it, you’ll do a double-take!
INGREDIENTS
REAL RED VELVET CAKE
- 8 large eggs, separated
- 160g sugar
- 20ml lemon juice
- pinch of salt
- 70g flour
- 30ml cocoa powder
- 50ml Good Life organic beetroot powder
CREAM CHEESE ICING
- 300g smooth cream cheese, softened
- 150g butter, softened
- 5ml vanilla extract
- 750g icing sugar
- Extra icing sugar, for dusting
- Edible flowers, to decorate
METHOD
- Preheat the oven to 200°C. Grease and line a large baking tray (30 x 40cm) with greaseproof paper.
- Using a stand mixer or hand-held electric mixer, beat the egg yolks, 140g of the sugar and the lemon juice together until pale and thick, around 3-4 minutes.
- In a separate bowl, whisk the egg whites and salt until soft peaks form. Gradually add in the remaining 20g sugar and continue whisking until just forming stiff peaks.
- Sift the flour, cocoa and beetroot powder into a bowl, then gently fold into the egg yolk mixture in 2 batches.
- Lightly stir in a third of the meringue mixture to loosen the batter, then gently fold in the rest.
- Carefully spread the mixture into the prepared tin and lightly smooth the surface.
- Bake for 15 minutes. Meanwhile place a clean tea towel on your counter and dust liberally with icing sugar.
- Leave the cake to cool in the pan for 5 minutes (not longer), then carefully flip out onto the tea towel. Peel the greaseproof paper off the back, then trim the edges with a sharp knife to neaten.
- Immediately roll up the cake from the short side (with the tea towel) until you have a Swiss roll shape. Leave to stand for 20 minutes (or until cool) to set the shape.
- Meanwhile make the cream cheese icing. Beat the butter and cream cheese together until smooth. Both should be well softened to avoid lumps. Mix in the vanilla.
- Gradually sift in the icing sugar and beat well after each addition until you have a gorgeously glossy and smooth icing.
- Now unroll the cake, and with the short end closest to you, measure and cut three equal strips parallel to the long edge, each about 10cm wide.
- Spread each of the strips of sponge with a layer of icing, using just less than half of the icing.
- Now for the fun bit! Take one strip of sponge cake and, starting with the short end, roll it up. Once this strip is rolled, position the exposed end at the beginning of the next strip and keep rolling. Repeat with the last strip. Turn the cake onto it’s flat side so that it stands upright. Refrigerate for about 30 minutes so that the icing can firm up.
- Cover the top and sides of the cake with a thin layer of icing – this is the crumb coat and seals in any loose crumbs. Refrigerate for a further 30 minutes.
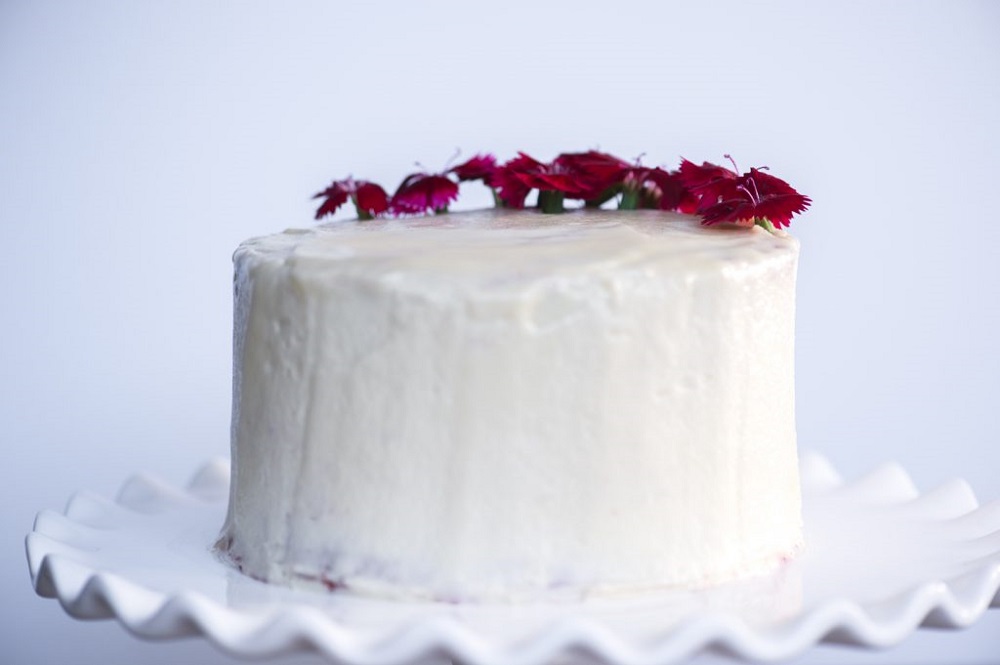
- Use the remaining icing to cover the cake completely. Refrigerate until ready to serve. Just before serving, decorate with edible flowers or a sprinkle of beetroot powder.
No Comments