
05 Oct 4 Simple but Effective Yoga Poses for Neck and Shoulder Pain
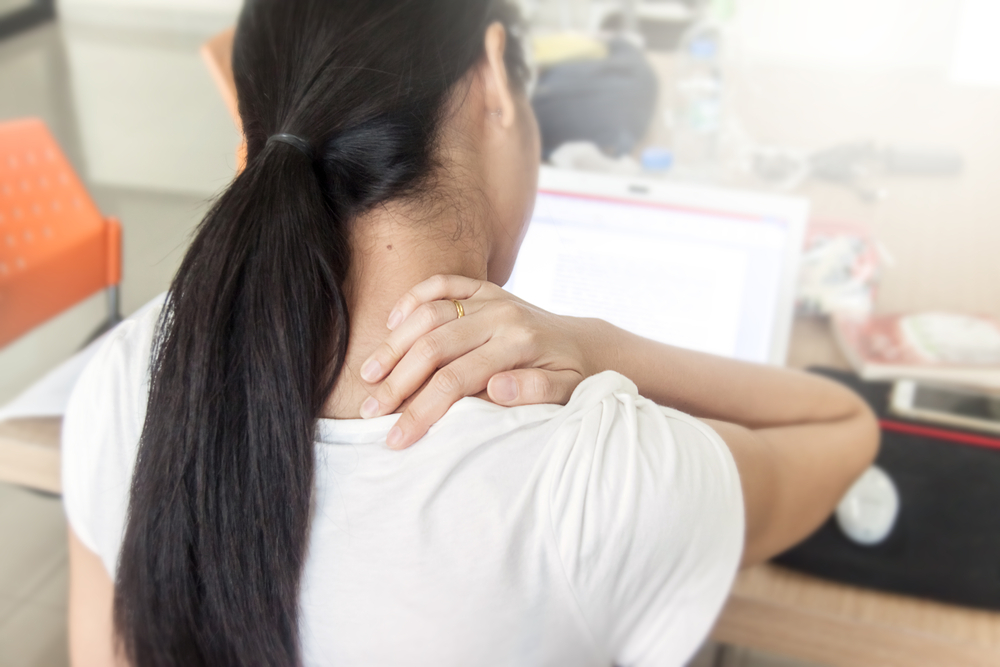
We spend most of our lives working in front of laptops, and much of our free time dealing with the side effects of bad posture. But here’s where simple yoga can really help. Forget all the complex balances and intertwining yourself into pretzels. Nature gave us everything we need in our bodies to feel our best, so in knowing how to move your body to alleviate any ache and pain you can combat the physical stressors that arise from lengthy periods of living the desk job life.
These easy yoga poses can be done at your desk throughout the day and offer you a starting point for feeling into your own body. Once you begin to move, much like a cat or dog, you will automatically find ways to stretch into the areas where you are feeling your tensions. You are an intuitive being, listening to your body is a big part of practising mindful yoga.
I’ve picked these 4 poses and mini exercises to help alleviate some of the root causes of what’s becoming known as ‘tech-neck’, an excessive strain on the cervical spine from constant downward gazing at screens. All the typing and texting also causes excessive forward rotation of the shoulders as they round forwards leaving the chest area collapsed inward and concave. The more the lower back collapsed, the more the shoulders round forward and the further our head extends forward as the heavy weight on top which we simply can’t support with our bad tech habits and poor posture. All this results in painful neck and shoulder pain, a Quasimodo-like posture, and can eventually lead to numbing sensations in your hands and fingers as well as severe migraines. They’re all avoidable if you act now.
1. Activation for head and neck alignment
This isn’t so much a yoga pose as an activation of a specific muscle, the rhomboids in the upper mid back, that help to keep the head upright and above the spine instead of sinking forward. For every 3 cm that your head is reaching forward, your head becomes almost 4.5 kg heavier which all places strain down the back of the neck and across the shoulders. Extensive sitting like this results in a turtleneck or what is often referred to as tech-neck. This little activation helps you to strengthen the muscles in the upper mid back, helping to bring your shoulder and neck position naturally back into alignment.
How to do it
1. Lift your palms forward and in front of you facing the ceiling and draw your upper arms in towards your torso.
2. Keep the upper arms active almost as if you’re clasping a magazine from falling out.
3. Take a deep inhale, draw your thumbs backwards on a horizontal plane, keeping the upper arms hugging the body.
4. On the exhale release them to the starting position again.
5. Repeat this a few times, being mindful of not overarching the back. Rather draw the navel in and tuck the bottom of the breastbone down towards the pubis.
Why this works
The movement of your thumbs outward activates the teres minor muscles which connect your outer arm to your shoulder blades. This effectively helps you to open and expand the chest, as well as lifting and rotating the shoulder girdle back and down the spine, naturally creating room for the head to move back into alignment without congesting the neck.
2. Neck Side Stretch
This is a natural reflexive movement for the body when the space around the neck and shoulder area feels pinched.
How to do it
1. Sit up straight on your chair with your feet planted firmly on the ground (barefoot is best).
2. Draw your navel in and lengthen the spine.
3. Inhale your right arm upwards, moving in a 180º semi-circle away from you.
4. Bend the elbow of your raised arm and gently place the hand over your left ear. Your left arm can bend behind your back to draw the left shoulder blade down.
5. On the exhale, gently draw your right ear down just in front of your right shoulder, keeping the chin tucked.
6. Repeat on the opposite side, moving slowly.
What to focus on
Slow deep breathing is key with this one. Give yourself the space to feel into the stretch and taking a few breaths during point 5, softening any tension.
3. Hand Clasp
This is a particularly nice one for stretching and opening the often tight and contracted pectoral muscles across the front of your chest. These muscles tend to become contracted and concave from excessive slouch time over keyboards. However, while this is a very common pose for opening the front of the body, it is often done incorrectly – which can cause the muscles to further misalign.
How to do it
1. If your chair has a backrest, sit sideways on the chair so the backrest isn’t behind you.
2. Reaching behind you, bend your elbows and interlace your fingers.
3. Keeping the elbows bent, inhale, squaring the shoulders and drawing them back.
4. Be mindful of drawing the elbows in toward each other and getting the upper arms parallel.
5. Keep the gaze forward and the chin parallel to the floor.
5. Take another deep inhale and work towards elevating the chest and raising the hands towards straightening arms. But don’t straighten them fully as what often happens here is the shoulder girdle turns forward in overcompensation as flexible people hyperextend their arms, which doesn’t create the proper action of opening the chest. The point is to open the chest not extend the arms and by doing it with bent elbows the arm bones hug the shoulder joint, protecting the rotator cuffs of the shoulder from injury.
What to focus on
Drawing the elbows toward each other. Lift in the mid back, rather than crunching in the lumbar spine and dropping the hands in order to straighten the arms.
4. Seated Cat Cow
This is a wonderful little movement sequence that invites breath and flexibility into the spine. You don’t need to get down on all fours to feel the benefits. The concave back cow pose creates expansion in the front chest area and the rounded back cat pose creates length down and along the spine.
How to do it
1. Sit with your chair facing a wall so that the palms of your hands can touch the wall with your arms stretched out.
2. Your feet should be flat on the floor with your knees at a 90-degree angle.
3. Raise your hands to a height so your wrists are in alignment with your shoulders, fingers pointing up and elbows drawing down – you should feel an activation in the armpit if you’re doing this right.
4. On the inhale arch your back, looking up gently towards to cornice of the ceiling to find yourself in a seated cow pose.
5. On the exhale push your palms into the wall, drawing your navel into your spine and rounding the back for seated cat pose.
What to focus on
In cat pose, take care to draw the shoulder blades down the back expanding into the chest. Try to make each pose flow with the inhale and exhale to get maximum benefits.
Even if you’re not a die-hard yogi, these 4 easy to do asanas modified for desk friendly spaces, should go a long way to making sure you alleviate some of the side effects of sedentary work. With any luck, they’ll make you feel so great, you’re inspired to take your yoga journey to the next level
No Comments